
Have an action or event automatically set the value of a contact attribute
To add a contact attribute infill to your automation, follow these steps:
- Log in to your Business Dashboard
- Navigate to Tools
-1.png?width=15&height=16&name=image%20(8)-1.png) > Automations
> Automations - Select the automation you wish to edit or create a new one using one of the presets
Once you open the automation, you will enter the automation flow, which looks something like this:
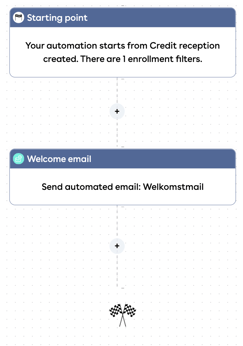
- Then click on one of the plus signs between the blocks, depending on when you want to add the contact attribute
- In the right edit screen, choose Set contact attribute and click Save
- The contact attribute is now added to your automation flow. An edit screen opens on the right. Here you determine which attribute should be filled in and what value should be given to it
🎉 A contact attribute has now been added to your automation.