
When a contact qualifies for automation, it starts running at the same time. By setting a delay time, you delay the action to be performed.
To add a delay time to your automation, follow these steps:
- Log in to your Business Dashboard
- Navigate to Tools
-1.png?width=15&height=16&name=image%20(8)-1.png) > Automations
> Automations - Select the automation you wish to edit under Overview automations or create a new one using one of the presets
Once you open the automation, you will enter the automation flow, which looks something like this:
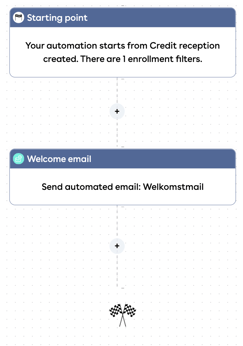
- Then click on one of the plus signs between the blocks, depending on when you want to add the delay time
- In the right edit screen, choose Delay Time and click Save
- The Delay Time has now been added to your automation flow. An edit screen opens on the right. Fill in the desired filters for the days, hours and minutes
🎉 Your automation is now updated with a delay time!